Even in the age of smart homes and air conditioning, there’s still a place for the ceiling fan. Plus, it’s got a certain retro cool factor.
The Weakest Link Is Usually the Pull Chain.
Like any machine, a ceiling fan has parts that can fail. If you’re lucky, the part that fails will be the ultimate low-tech item: the pull chain. A broken, stuck or jammed pull chain is one of the simpler, quicker DIY fixes in your home.
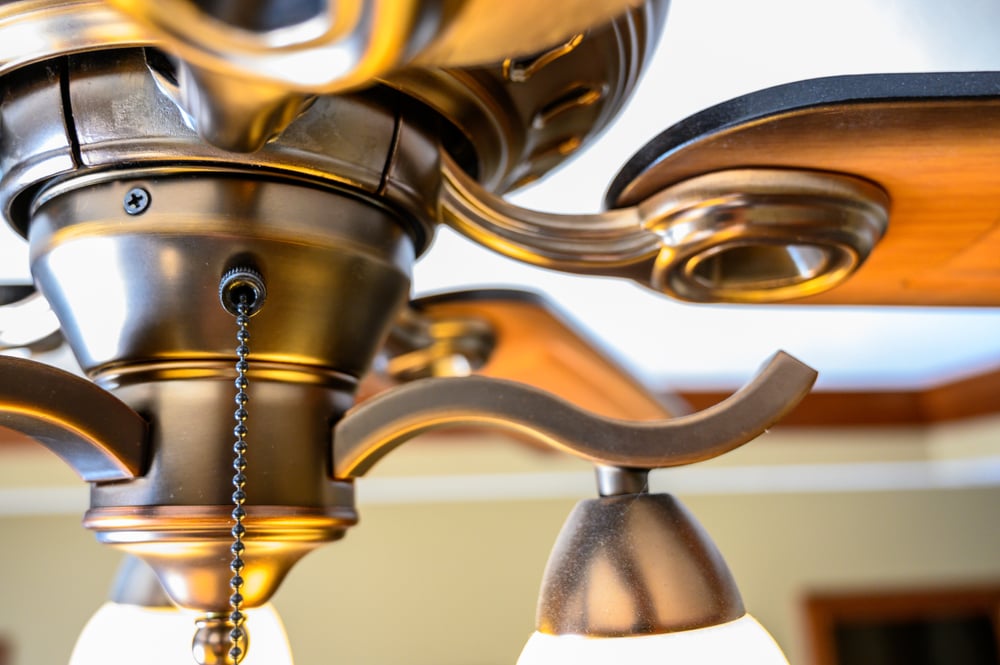
You should go into this job with an understanding of how ceiling fan chains work—and why they break. If your ceiling fan chain broke, it either happened inside or outside the part that houses the ceiling fan pull switch. Either way, friction occurs in the area where the chain goes into the housing and connects to the ceiling fan pull switch.
Considering how often that chain is pulled, it’s not a matter of if, but when it’s going to snap off. The real question is where the break will occur. Follow the steps we’ve outlined, and you should be able to get things moving again fairly easily.
Let’s See What’s Up.
If you can see any part of the pull chain, you’re in luck. Just attach an extension chain to it and you’re good to go.
If you can’t see any of the chain, that means it’s broken off inside the fan’s pull switch, which calls for a ceiling fan chain replacement. That’ll take a little more effort and a few basic tools, but it’s nothing you can’t handle.
Safety First.
Go to the circuit breaker and turn off the power to the room where you’ll be working to make sure you don’t get any unpleasant surprises.
Lights Off.
Unscrew the light bulbs and remove the sconces or globes. Then use a screwdriver to remove the screws that hold the light fixture in place.
When you get to the last screw, be careful because the fixture will most likely pop loose. Put the screws and the fixture aside.
Swap Out the Switch.
Now you should see where the fan chain travels through a metal collar. Try removing the collar with your fingers by turning it counterclockwise. If that doesn’t do the trick, wrap a soft rag around the collar to protect it and use a pair of pliers to remove the collar.
Then find the small plastic ceiling fan pull switch, which is attached to a few wires, and carefully pull it down.
If the ceiling fan pull switch is damaged or broken, replace the ceiling fan switch with one that’s compatible with your fan.
Change Out the Chain.
If the chain has broken off inside the ceiling fan pull switch, pry the switch open with a small flat-head screwdriver. Then remove the wiring from the switch and pull out the broken piece section of the chain that’s attached to the small disk inside, carefully using your screwdriver if you need to. Replace the broken chain with a fresh one and put the switch back together.
From here, you need to plug the wiring back into the switch, reattach the fixture nut, and carefully tuck your wiring back into the housing. You may find that it’s an extremely tight fit, but don’t force it back into place. Keep your eye on the screw holes to make sure they line up correctly. Then you can reattach the light fixture.
Once you’ve completed this step, turn on the power at the breaker. Then try pulling the ceiling fan pull chain to make sure everything is working the way it’s supposed to. If your ceiling fan chain replacement was a success, you can go ahead and reattach the light fixture and put your tools away. You’re all done.
At Frontdoor, we know you love getting things done around the house. Staying in control of your to-do list is easier when you can keep the small things from turning into bigger—and more expensive—ones. We help you gain the confidence and satisfaction that come with staying on top of your home’s health.
Want to learn more about how to fix a ceiling fan pull chain, replace a ceiling fan pull switch, or anything else about ceiling fans—or any other gadgets in your home? Download the app if you haven’t already, and video chat with a helpful, friendly Frontdoor Expert.
Frontdoor assumes no responsibility, and specifically disclaims all liability, for your use of any and all information contained herein.
Frontdoor assumes no responsibility, and specifically disclaims all liability, for your use of any and all information contained herein.
Was this article helpful?
